
Late July: Things Are Heating Up, and We’re in Harvest Mode
This week, we dish about harvesting garlic, sneaking "new" potatoes while you wait for the rest to keep growing, and finding creative ways to use overabundant zucchini and chard. We also offer some tips for handling potato blight and rotting zucchini blossoms.
Harvesting Garlic
It’s coming up to late July, so that means it’s time to harvest your garlic. Wait until about half the foliage has turned brown, from the bottom. You will be pulling the whole plant out of the ground, but you can gently dislodge the plants with a garden fork if you need to.
You can use the fresh garlic right away or store some in the fridge, and that’s a real treat!
If you want to save your garlic through the winter, you will have to cure the bulbs. Hang the garlic upright with all the foliage and roots attached, in bunches of 5 to 10 in a dry place that is out of the sun and has very good ventilation. We tie two bunches together and hang them over the rafters in a shed.

Curing takes about 2 to 3 weeks, depending on the humidity. When curing is complete, all the foliage will be brown and withered. Lop off the roots and tops, and store the bulbs.
You’ll want to save 20% of the bulbs for planting next year. Save the biggest bulbs for planting.
The nonprofit SeedMoney has a 5-minute video about harvesting and curing garlic that offers some tips you might find helpful.
Harvesting Potatoes
Your potato plants should be looking very full by now, and some may even be flowering. But don’t worry if they aren’t. Flowering doesn’t always happen (because the plants may still be forming tubers under the ground).
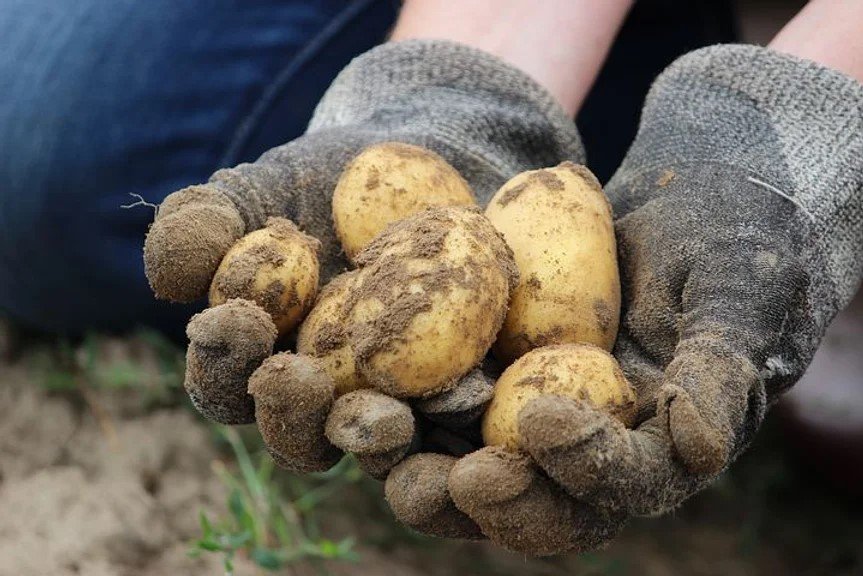
Knowing when to harvest potatoes can be tricky, because the produce is underground. If you planted your spuds in May, meaning more than 8 weeks have passed, you can start reaching your hands down into the soil about 4 to 5 inches to steal what are called “new potatoes” to eat now. These will be thin-skinned, small- to medium-sized tubers.
Be careful not to disturb the roots too much. And when you’re done fishing around, readjust the soil so that it covers up the stem again.
For your main harvest, you should wait until the foliage dies back before digging deep and retrieving the rest of the tubers. We usually wait until mid-fall to dig our potatoes because the cool, moist ground is the best place to store them!
With our humid summers on Cape Cod, our plants are sometimes hit with blight that causes the leaves to turn yellow and then brown.
If you notice blight on your potato plants, you can cut back all the foliage, bag it, and bring it to the trash. Blights are fungi that can live in soil for years, so don’t compost the affected foliage; otherwise, you can spread the blight.
Even if you have to remove the foliage, your potatoes will still be safe down in the ground until fall. But definitely plant your potatoes in a different place next year, and if any strays show up from last year, be sure to dig them up and destroy them because they probably carry the blight.
Either way, don’t hold back on digging and enjoying those potatoes as you need them!
Zucchini Coming Out Your Ears?
But Why Is the End Rotting?
Something happens in early July: the summer squash plants just explode. The leaves double in size each week, and the blossoms come nonstop. But sometimes you’ll notice that the end of the fruit that has the blossom will turn brown and mushy. That’s called blossom end rot, and it’s caused by a calcium deficiency that is easily remedied. Here are three ways to combat blossom end rot:
Save up your eggshells, crush them into a fine powder in a food processor, and sprinkle the dust around your squash plants to give them calcium.
Crush up 1 or 2 antacid tablets and spread them around each plant to give them a quick dose of calcium.
Mix 1 gallon of water with 1 cup of milk and spray it on the plant and soil.
Pruning some of the leaves also helps by increasing air circulation. The developing zucchini benefit mostly from the leaves growing above them. Any leaves below the developing fruit can be pruned. When you remove a leaf, take all of its stem as well, because this is essentially a hollow tube that will easily collect water and rot.
Recipes for All That Squash & Chard

Everyone loves zucchini. Until, that is, all of a sudden they start flowing into your kitchen by the armful. They fill up counter space, and forget the fridge—that was full ages ago. We start asking, Do you think the neighbors will take some? Please?
This year, we have looked for more creative ways to use up all that zucchini, as well as our plentiful patty pans. We've made a few loaves of zucchini bread. We’ve sautéed squash with spices to put in tacos and burritos. We’ve thinly sliced the veggies and added them to sandwiches and spring rolls. Our new favorite option is zucchini hash browns. They’re quick and easy, great for any meal, and full of possibilities. Just scroll down for the recipe.
Chard can also be prolific this time of year. The standard sautéed chard with butter, salt, and pepper is a great addition to any meal, but what else can we do with all these greens? Well, for one, we've started using the large, flat leaves as a replacement for bread with egg salad or tuna sandwiches, or really for any sandwich wrap. The rainbow stems make a nice fridge pickle, but our favorite recipe yet is a chard tahini dip, which we share with you below.
Zucchini Hash Browns

Ingredients:
1 medium zucchini
2 potatoes
1 TB flour
1 tsp garlic powder
salt and pepper to taste
olive oil for cooking
Optional:
smoked paprika
chili flakes
fresh garden herbs
grated carrot
parmesan cheese
Instructions:
Using a box grater or spiralizer, grate the zucchini and potato.
Place the veggies in a fine mesh bag, cheesecloth, or even paper towel and then squeeze out any excess liquid over the sink.
Transfer the veggies to a medium bowl and add the flour and spices. Mix until the veggies are evenly coated.
Heat a little oil in your pan. Then scoop about a quarter-cup of your mixture onto the hot oil and flatten out the grated veggies to your desired hash-brown thickness and shape.
Cook on one side until brown and then flip. Keep cooking to your desired crispiness.
This recipe is versatile, so make it your own! Add carrots or finely chopped onion, and play with any spices and herbs you have in your garden and kitchen.
Chard Tahini Dip
Ingredients:
1 to 2 lbs swiss chard, ribs removed and chopped
3 to 5 cloves of garlic, minced
1/2 cup tahini
1/3 cup lemon juice
salt and pepper to taste
Instructions:
Heat a tablespoon or so of olive oil in a large skillet and add handfuls of chard at a time, letting the first ones wilt and bit and then adding the next, and so on, to fit them all in the pan.
Add minced garlic and some salt and pepper.
Once the chard leaves and stems are wilted and tender, let them cool in a bowl before transferring them to the food processor.
Add tahini and lemon juice and blend until smooth.
We've been eating this with crackers and pita bread, on veggie burgers and in salads.
Happy cooking!